기본설정
npm install express cors axiosexpress, cors, axios 패키지 설치
//server.js
const express = require('express')
const cors = require('cors')
const axios = require('axios')
// 서버 생성
const app = express()
// URL/메소드 제한
app.use(cors({
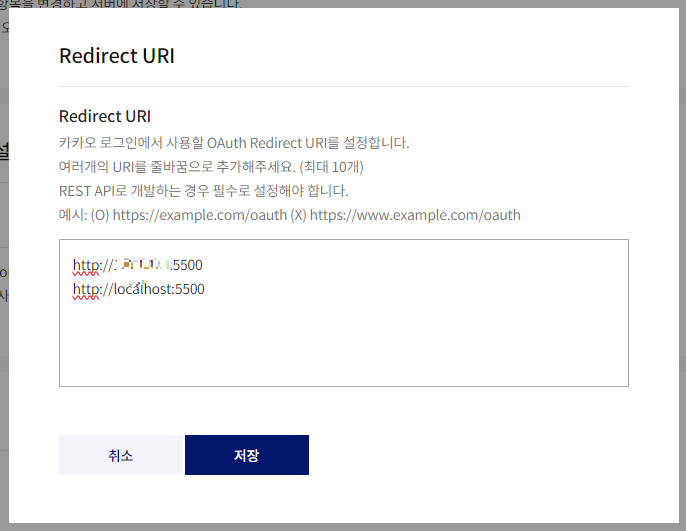
origin: ['http://127.0.0.1:5500', 'http://localhost:5500'], // 본인 localhost 도메인|포트 입력
methods: ['OPTIONS', 'POST', 'DELETE']
}))
// json데이터를 JS객체로 파싱하여 자동 변환
app.use(express.json())
// 3000포트로 서버 실행
app.listen(3000, () => console.log('서버 열림!'))
// 콘솔에서 node server.js 로 구동가능기본 서버 구동 틀 작성
// login.js
// 적용에 필요한 DOM 요소들을 가져옴
const kakaoLoginButton = document.querySelector('#kakao')
const naverLoginButton = document.querySelector('#naver')
const userImage = document.querySelector('img')
const userName = document.querySelector('#user_name')
const logoutButton = document.querySelector('#logout_button')

// 어떤 로그인 방식을 했는지 저장
let currentOAuthService = ''


// index.html
<!DOCTYPE html>
<html lang="ko">

<head>
    <meta charset="UTF-8">
    <meta name="viewport" content="width=device-width, initial-scale=1.0">
    <link rel="stylesheet" href="style.css">
    <title>Document</title>
</head>

<body>
    <div id="container">
        <h1>OAuth 실습</h1>
        <button id="kakao">카카오 로그인</button>
        <button id="naver">네이버 로그인</button>
        <hr>
        <main>
            <img />
            <div>유저 이름</div>
            <span id="user_name"></span>
            <button id="logout_button">로그아웃</button>
        </main>
        <script src="https://cdn.jsdelivr.net/npm/axios/dist/axios.min.js"></script>
        <script src="login.js"></script>
    </div>
</body>

</html>
JS 코드 작성
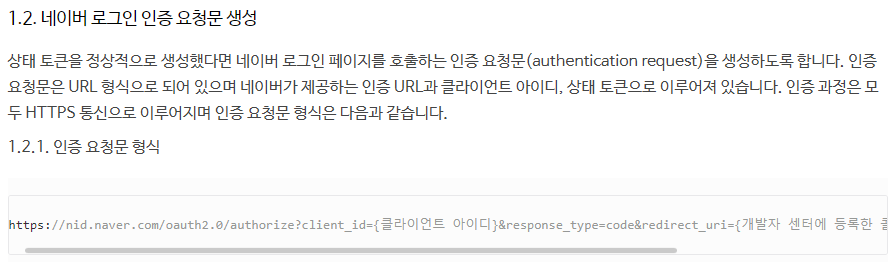
인가코드 받기
요청 보내기
// login.js
// 요청을 받아올 URL
const redirectURI = 'http://127.0.0.1:5500'
// ClientId와 Secret은 외부로 노출하지 말 것
const kakaoClientId = '클라이언트 ID'
const naverClientId = '클라이언트 ID'
const naverClientSecret = '클라이언트 Password'
const naverSecret = 'it_is_me' //임의의 문자열
// 버튼을 눌렀을 때, URL 주소를 바꿔 요청을 보냄
kakaoLoginButton.onclick = () => {
location.href = `https://kauth.kakao.com/oauth/authorize?client_id=${kakaoClientId}&redirect_uri=${redirectURI}&response_type=code`
}
naverLoginButton.onclick = () => {
location.href = `https://nid.naver.com/oauth2.0/authorize?client_id=${naverClientId}&response_type=code&redirect_uri=${redirectURI}&state=${naverSecret}`
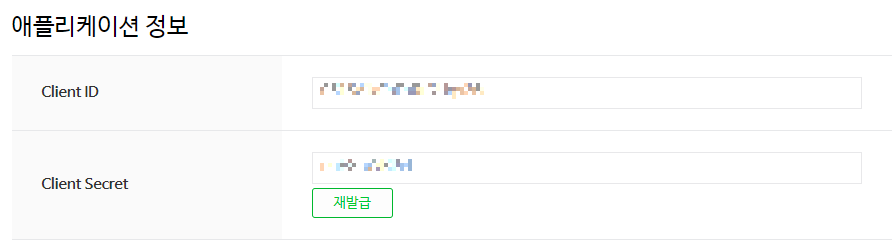
}kakao / naver 각 developers에서 애플리케이션 등록 후
각각의 Client / Secret을 받고 변수에 저장해준다
(배포할 경우 해당 정보는 환경변수 담든 뭐든 보안처리 후 배포할 것)
kakao 로그인 관련 문서
https://developers.kakao.com/docs/latest/ko/kakaologin/rest-api#request-code
naver 로그인 관련 문서 (한 페이지에 다 있어서 검색해서 찾아갈 것)
https://developers.naver.com/docs/login/web/web.md
여기서 naver는 쿼리 파라미터에 state값을 담아달라고 하는데
서비스에서 받아오는 값이 아닌 Client에서 자체적으로 만들어 입력하면 된다
const naverSecret = "it_is_me"가 해당 사항이다
요청 보내기가 성공하면
버튼을 누를 때마다 아래와 같이 URL 주소가 바뀌는 걸 볼 수 있다
쿼리 파라미터로 들어온 code값이 중요한 인가코드이다

응답 받기
// login.js
window.onload = () => {
    // URL 정보를 가져옴
    const url = new URL(location.href)
    const urlParams = url.searchParams
    const authorizationCode = urlParams.get('code') // 쿼리 파라미터의 code값
    const naverState = urlParams.get('state') // 쿼리 파라미터의 state값 *naver가 아니면 값은 undefind

    // 인가코드 authorizationCode가 성공적일 때
    if (authorizationCode) {
        if (naverState) {
            // 해당 주소로 리소스서버에 인가코드 보냄 (naver인증토큰 받기 위함)
            axios.post('http://localhost:3000/naver/login', { authorizationCode })
                ...
        } else {
            // 해당 주소로 리소스서버에 인가코드 보냄 (kakao인증토큰 받기 위함)
            axios.post('http://localhost:3000/kakao/login', { authorizationCode })
                ...
        }
    }
}

// ...공간은 아래단락에서 추가로 입력할 예정
이제 URL주소에 있는 code값을 가져온 뒤에 리소스서버로 보내준다
여기서 로그인을 어떤 서비스로 했냐 구분을 해줘야 하는데
naver에선 kakao와 달리 State라는 값을 추가로 더 요구하기 때문에
쿼리파라미터에서 State가 있으면 naver이고, 없으면 kakao인거다
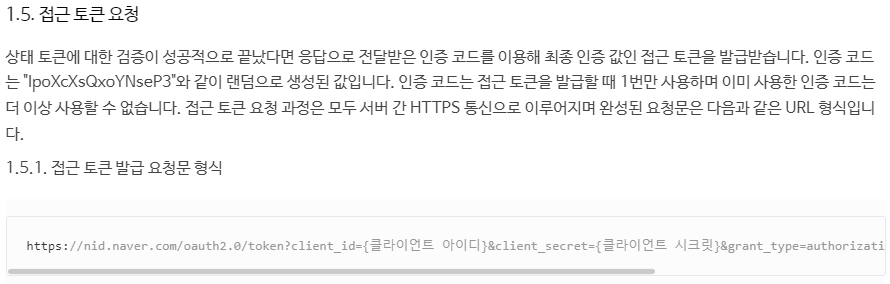
인증 토큰 요청
요청 보내기
// server.js

// kakao로 토큰 요청
app.post('/kakao/login', (req, res) => {
    const authorizationCode = req.body.authorizationCode
    // 문서 참고
    axios.post('https://kauth.kakao.com/oauth/token', {
        grant_type: 'authorization_code',
        client_id: kakaoClientId,
        redirect_uri: redirectURI,
        code: authorizationCode
    }, {
        headers: { 'Content-Type': 'application/x-www-form-urlencoded;charset=utf-8' }
    })
        // Client로 토큰 보냄
        .then(responses => res.send(responses.data.access_token))
})

// naver로 토큰 요청
app.post('/naver/login', (req, res) => {
    const authorizationCode = req.body.authorizationCode
    // 문서 참고
    axios.post(`https://nid.naver.com/oauth2.0/token?client_id=${naverClientId}&client_secret=${naverClientSecret}&grant_type=authorization_code&state=${naverSecret}&code=${authorizationCode}`)
        // Client로 토큰 보냄
        .then(response => res.send(response.data.access_token))
})
이제 Client에서 받아온 인가코드를 받아
다시 서비스로 문서에 따라 토큰 요청을 보내면 된다
여기서 인가코드를 받아올 때 req.body를 사용한 걸 볼 수 있는데
기본 설정할 때 설정했던 자동 파싱 기능으로
Client로 받아온 json을 객체로 다시 변환시켜준 값이 body인 것이다
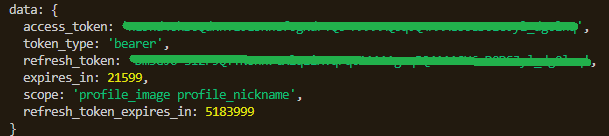
이후 응답받은 토큰들을 다시 Client로 보내주면 된다
kakao 관련 문서
https://developers.kakao.com/docs/latest/ko/kakaologin/rest-api#request-token-request
naver 관련 문서 (한 페이지에 다 있어서 검색해서 찾아갈 것)
https://developers.naver.com/docs/login/web/web.md
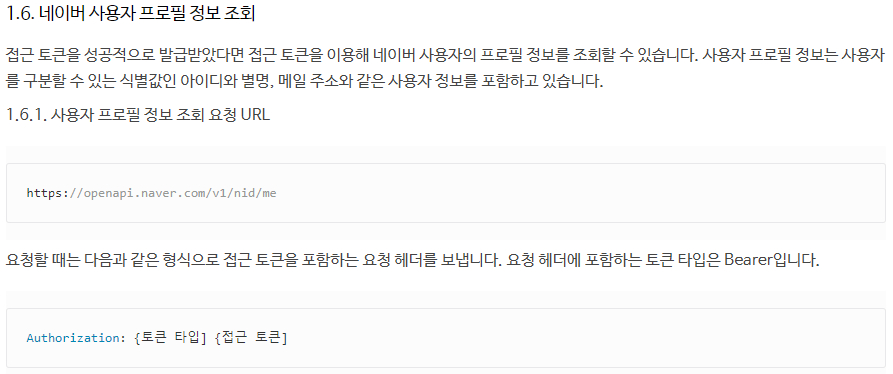
사용자 정보 요청
// server.js

// kakao로 사용자정보 요청
app.post('/kakao/userinfo', (req, res) => {
    // 문서 참고
    const { kakaoAccessToken } = req.body
    axios.get('https://kapi.kakao.com/v2/user/me', {
        headers: {
            Authorization: `Bearer ${kakaoAccessToken}`,
            'Content-Type': 'application/x-www-form-urlencoded;charset=utf-8'
        }
    })
        // 받아온 사용자 정보를 Client로 보냄
        .then(response => res.json(response.data.properties))
})

// naver로 사용자정보 요청
app.post('/naver/userinfo', (req, res) => {
    const { naverAccessToken } = req.body
    // 문서 참고
    axios.get('https://openapi.naver.com/v1/nid/me', {
        headers: {
            Authorization: `Bearer ${naverAccessToken}`
        }
    })
    // 받아온 사용자 정보를 Client로 보냄
    .then(response => res.json(response.data.response))
})
// login.js - window.onload 마저쓰기
if (authorizationCode) {
if (naverState) { // 네이버
axios.post('http://localhost:3000/naver/login', { authorizationCode })
.then(res => {
// 토큰을 반환받고 변수에 저장 후 해당 주소의 리소스서버로 요청
naverAccessToken = res.data
return axios.post('http://localhost:3000/naver/userinfo', { naverAccessToken })
})
// 사용자 정보를 반환받고 화면에 그려줌
.then(res => {
renderUserInfo(res.data.name, res.data.profile_image)
currentOAuthService = 'naver'
})
} else { // 카카오
axios.post('http://localhost:3000/kakao/login', { authorizationCode })
.then(res => {
// 토큰을 반환받고 변수에 저장 후 해당 주소의 리소스서버로 요청
kakaoAccessToken = res.data
return axios.post('http://localhost:3000/kakao/userinfo', { kakaoAccessToken })
})
// 사용자 정보를 반환받고 화면에 그려줌
.then(res => {
renderUserInfo(res.data.nickname, res.data.profile_image)
currentOAuthService = 'kakao'
})
}
}
function renderUserInfo(name, img) { // 이미지,이름 업데이트용
userName.textContent = name;
userImage.src = img;
}이제 거의 마지막 단계인 제일 원하던 사용자정보를 요청하면 된다
이번엔 axios.post가 아닌 get으로 요청을 받아왔는데
이전처럼 요청을 보내고 서비스가 값을 주는 게 아닌
인증토큰을 가지고 언제든지 꺼내가면 되기 때문에 get을 써준다
(상담사를 통해 인증하는 과정에서 인증이 끝나고 이제부터 알아서 상담사없이 자료를 가져가는 느낌?)

그렇게 사용자정보를 가져온 후 Client로 보내 화면에 그려주면 거의 다 끝났다
kakao 관련문서
https://developers.kakao.com/docs/latest/ko/kakaologin/rest-api#req-user-info
naver 관련문서 (한 페이지에 다 있어서 검색해서 찾아갈 것)
https://developers.naver.com/docs/login/web/web.md
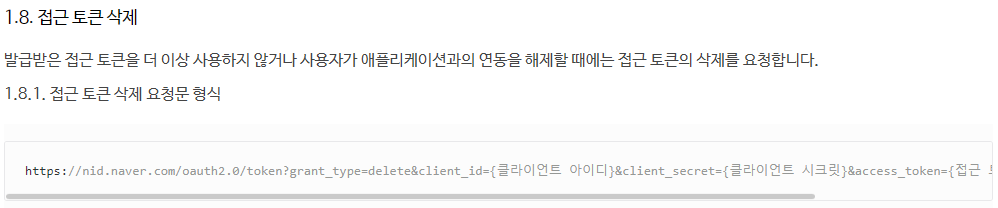
로그아웃
// login.js

// 로그아웃 버튼 눌렀을 때
logoutButton.onclick = () => {
    if (currentOAuthService === 'kakao') {
        axios.delete('http://localhost:3000/kakao/logout', {
            data: { kakaoAccessToken }
        })
            .then(res => {
                renderUserInfo('', '') // 빈 문자열을 넣어 요소 비우기
            })
    } else {
        axios.delete('http://localhost:3000/naver/logout', {
            data: { naverAccessToken }
        })
            .then(res => {
                renderUserInfo('', '') // 빈 문자열을 넣어 요소 비우기
            })
    }
}
// server.js
app.delete('/kakao/logout', (req, res) => {
const { kakaoAccessToken } = req.body
// 카카오 로그아웃
axios.post('https://kapi.kakao.com/v1/user/logout', {}, {
headers: {
Authorization: `Bearer ${kakaoAccessToken}`
}
})
.then(response => res.send('로그아웃 성공'))
})
app.delete('/naver/logout', (req, res) => {
const { naverAccessToken } = req.body
// 네이버 로그아웃
axios.post(`https://nid.naver.com/oauth2.0/token?grant_type=delete&client_id=${naverClientId}&client_secret=${naverClientSecret}&access_token=${naverAccessToken}&service_provider=NAVER`)
.then(response => res.send('로그아웃 성공'))
})로그인이 있으면 로그아웃도 있어야죠
kakao 관련 문서
https://developers.kakao.com/docs/latest/ko/kakaologin/rest-api#logout-of-service-and-kakaoaccount
naver. 관련 문서 (한 페이지에 다 있기 때문에 검색해서 갈 것)
https://developers.naver.com/docs/login/web/web.md
완성
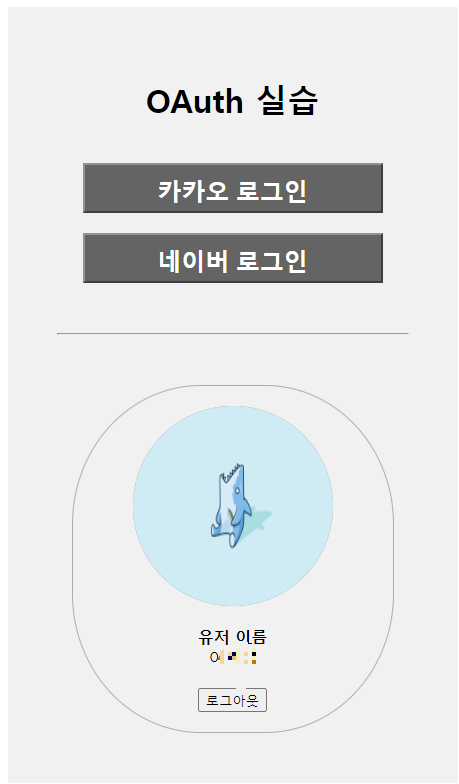
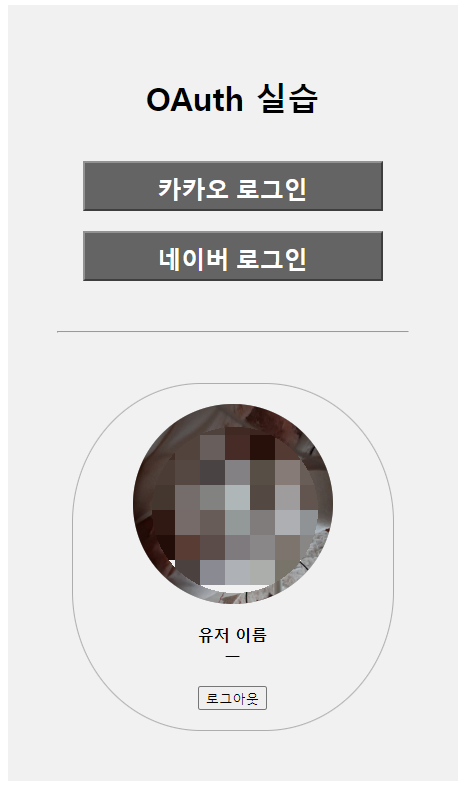
네이버 로그인을 누르면 네이버에서 등록한 정보가
카카오면 등록한 정보가 뜨게 되는 걸 볼 수 있다
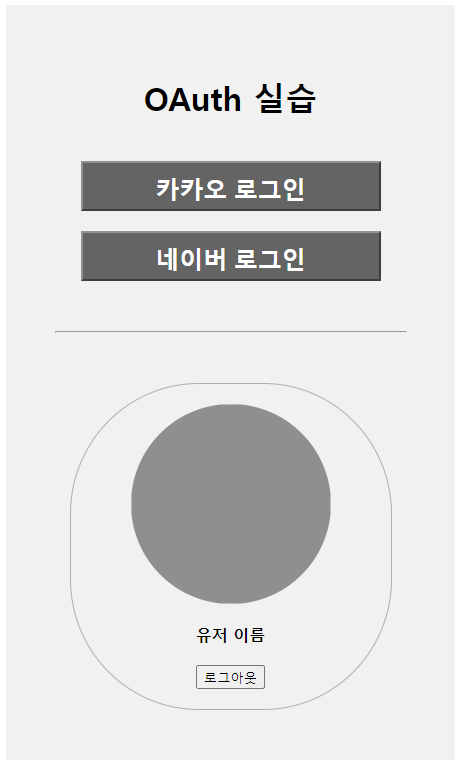
로그아웃도 잘 되는 모습이다
style.css ▼
body {
    display: flex;
    justify-content: center;
    margin: 30px;
}

#container {
    display: flex;
    flex-direction: column;
    align-items: center;

    background-color:rgb(241, 241, 241);

    width: 100vw;
    max-width: 350px ;
    padding: 50px;
}

hr {
    width: 100%;
    margin: 50px 0;
}

#kakao {
    background-color: rgb(100, 100, 100);
    border-color: rgb(146, 146, 146);

    color: white;
    font-size: 1.5rem;
    font-weight: bold;

    padding: 10px;
    margin: 20px 0;
    width: 300px;
    height: 50px;
}

#naver {
    background-color: rgb(100, 100, 100);
    border-color: rgb(146, 146, 146);

    color: white;
    font-size: 1.5rem;
    font-weight: bold;

    padding: 10px;
    width: 300px;
    height: 50px;
}

main {
    display: flex;
    flex-direction: column;
    align-items: center;

    border: 1px solid rgb(173, 173, 173);
    border-radius: 40%;

    width: 80%;
    padding: 20px;
}

img {
    border-radius: 50%;

    background-color: rgb(143, 143, 143);

    width: 200px;
    height: 200px;
}

main > div {
    font-weight: bold;

    margin-top: 20px;
}

span {
    margin-bottom: 20px;
}
문서 직접 찾아가기 / 권한설정 (카카오) ▼
1. "kakao Developers" 검색 후 사이트 방문

2. 최상단에 위치한 nav바에서 '내 애플리케이션" 클릭

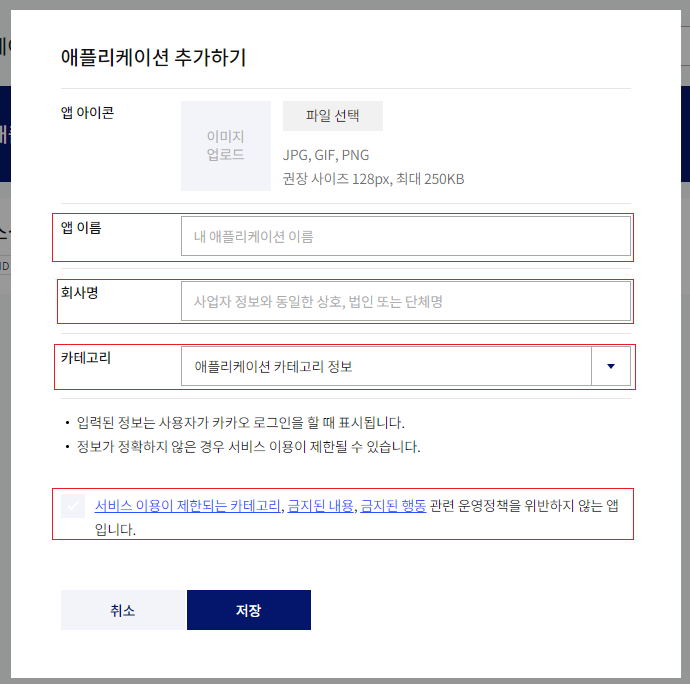
3. 로그인 후 "애플리케이션 추가하기"

4. 앱 이름, 회사명, 카테고리 입력 후 동의하고 "저장"하기
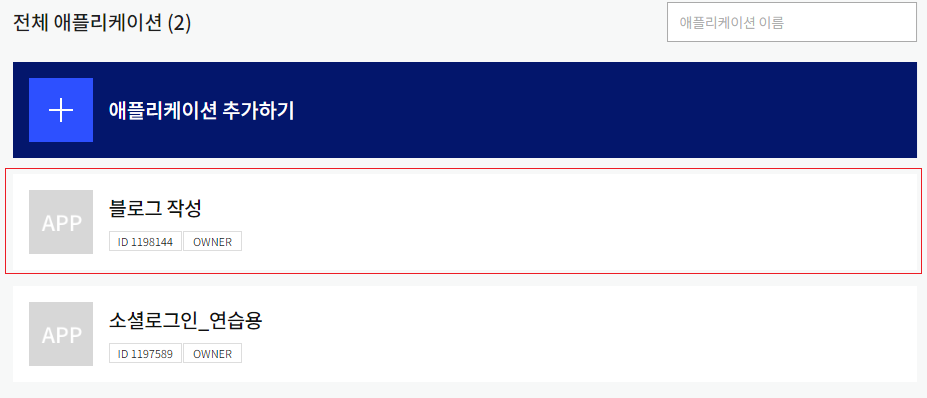
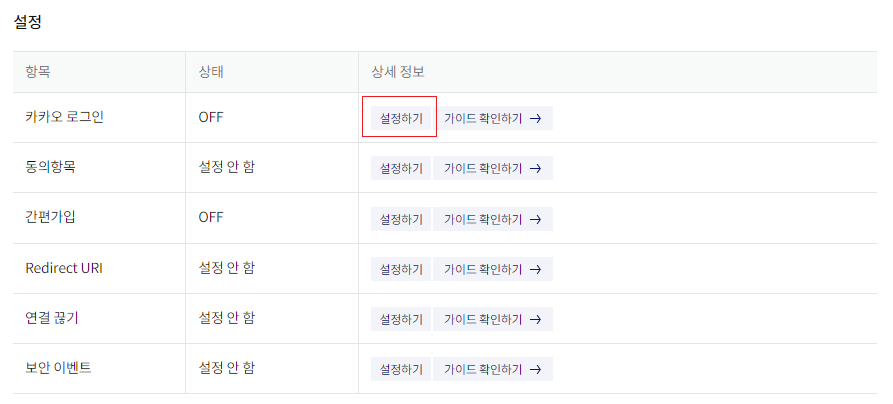
5. 추가한 애플리케이션에 들어간 뒤, "설정 - 카카오 로그인 - 설정하기" 들어가기
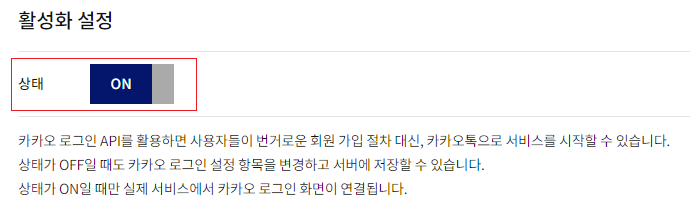
6. 활성화 설정 켜기
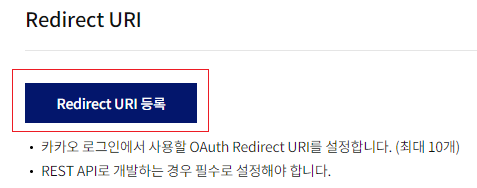
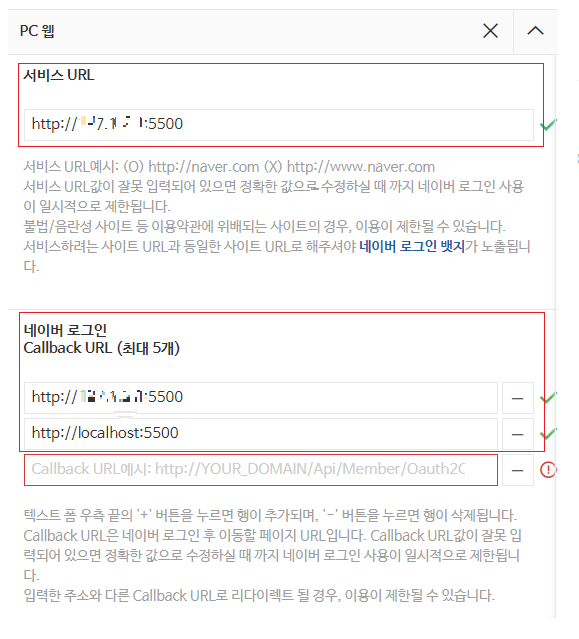
7. 맨하단에 위치한 RedirectURL 등록
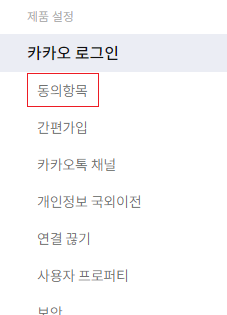
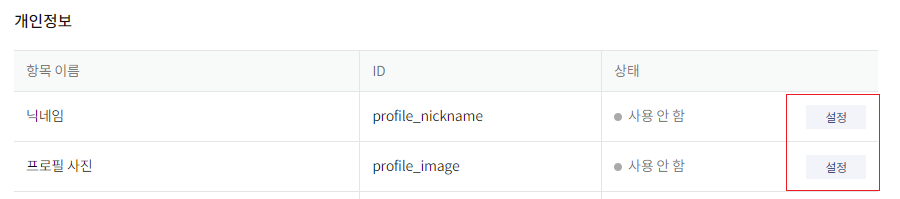
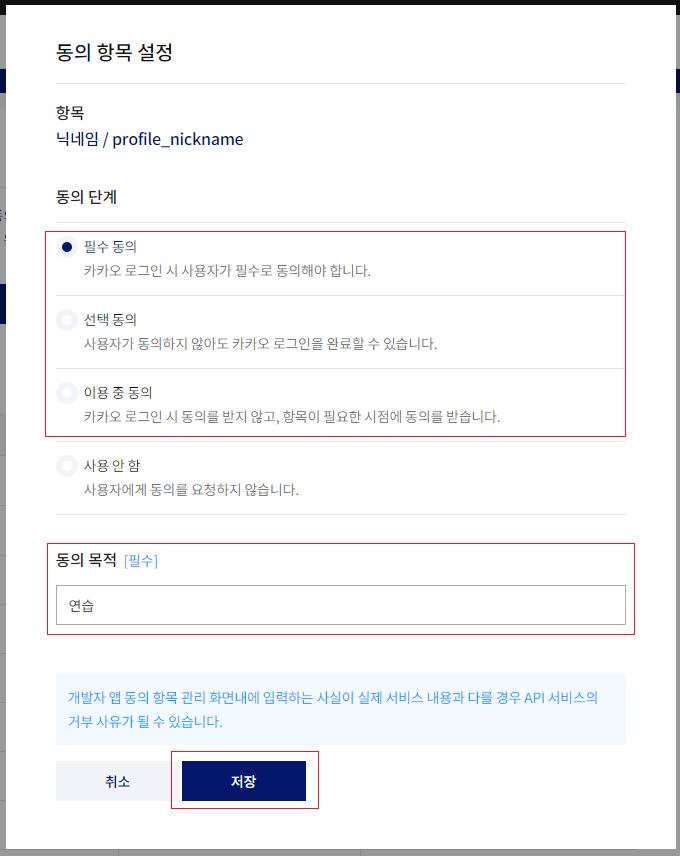
8. 사이드바에 있는 "동의항목" 들어간 후 닉네임,사진 설정에서 동의 후 저장
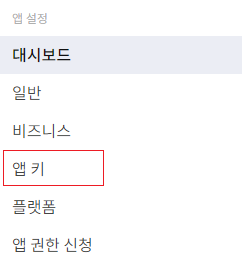
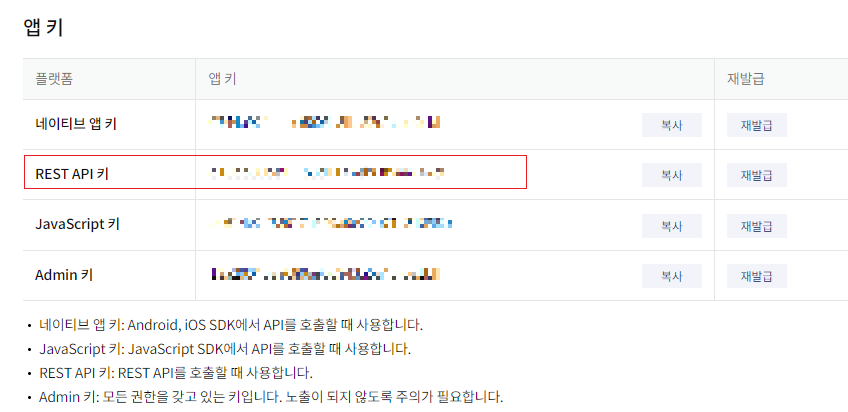
9. 사이드바에 있는 "앱 키" 들어간 후, "REST API 키" 확인하기
- END -
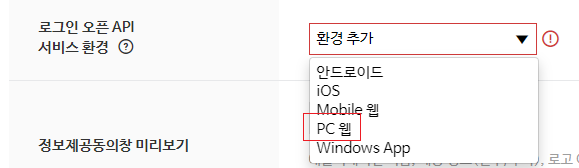
문서 직접 찾아가기 / 권한설정 (naver) ▼
1. "네이버 개발자센터" 검색

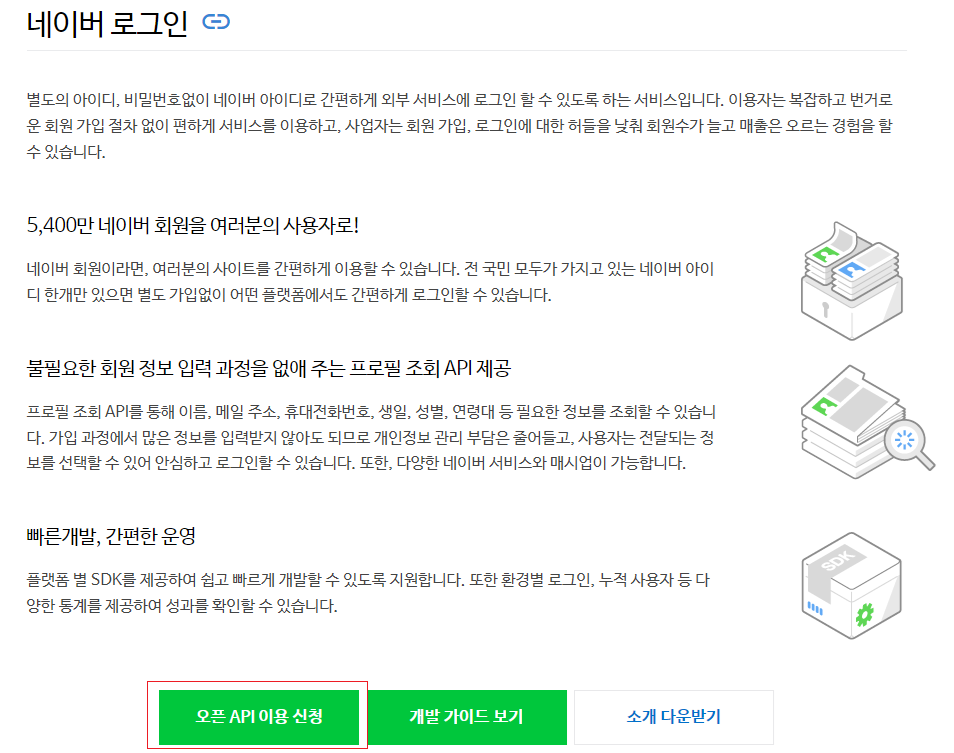
2. 사이트 중간에 있는 nav바에서 "네이버 로그인" 클릭

3. 아래에 있는 "오픈 API 이용 신청" 클릭
4. 관련 정보들 작성 후 동의하고 저장하기
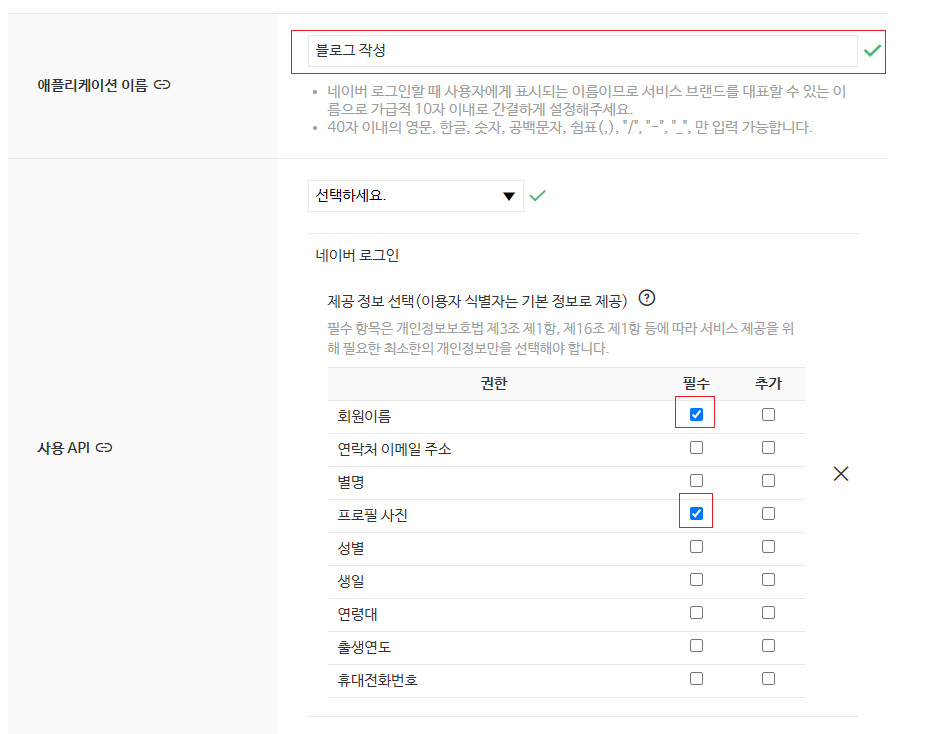
5. 아이디와 시크릿 확인하기
- END -
'OZ' 카테고리의 다른 글
| [AWS] CloudFront (0) | 2025.02.13 |
|---|---|
| [AWS] S3 배포하기 (0) | 2025.02.12 |
| [OAuth2.0] 개념 (0) | 2025.02.09 |
| [Node.js] 네트워크와 HTTP / HTTPS (0) | 2025.02.04 |
| [React] 번들링과 코드스플리팅 (0) | 2025.01.12 |